How to preheat a calorimeter
First, necessary preparations before preheating
Before the calorimeter is preheated, it is necessary to make basic guarantees. Check whether the power supply connection of the instrument is stable to ensure that the power supply voltage meets the rated requirements of the equipment and avoid voltage fluctuations affecting the preheating effect; at the same time, check whether the appearance of the instrument is damaged, confirm that the heat dissipation port is not blocked, and ensure smooth heat dissipation during the operation of the equipment. In addition, prepare the supporting test samples and tools in advance and put them in a position that is convenient for operation to save time for subsequent work.
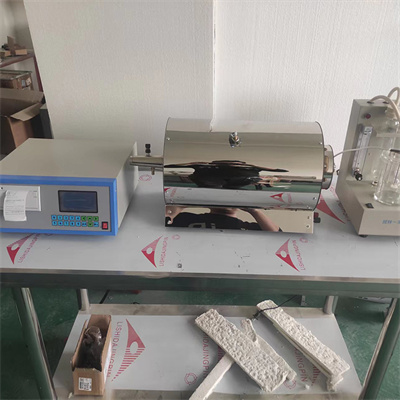
Second, strictly follow the steps to start the preheating
1. Boot operation: After turning on the power supply, press the power button of the calorimeter and wait for the instrument self-test to complete. During the self-test process, pay attention to whether there is an error prompt on the instrument display screen. If there is an abnormal code, you need to check the fault first, and do not force it into the warm-up process.
2. Set the preheating parameters: After the self-test is passed, enter the operation interface, and set the preheating temperature and preheating time according to the instrument model and detection needs. There are differences in the parameters of different models of calorimeters, so you need to strictly refer to the equipment manual to ensure accurate parameter settings.
3. Start the preheating process: After the parameter settings are completed, click the "Start preheating" button to enter the preheating state of the instrument. At this time, observe the running state of the instrument to see if the heating parts are heating up normally and whether the fan is running stably to ensure the smooth progress of the preheating process.
III. Key monitoring points during the warm-up period
During the preheating process, it is necessary to monitor the whole process. First, pay attention to the temperature data of the instrument display screen to confirm that the temperature rises steadily at the set rate. If the temperature rises slowly or stagnates, it may be that the heating components are faulty and need to be stopped for inspection in time. Second, pay attention to the running sound of the instrument. If there is abnormal noise, it may be that the internal components are loose, and the preheating should be stopped immediately to check the problem. At the same time, it is forbidden to touch the instrument operation panel at will during the preheating period to avoid misoperation affecting the preheating effect.
Fourth, the confirmation work after the warm-up is completed
When the instrument reaches the set preheating temperature and stabilizes, it is necessary to confirm the preheating effect. Check the temperature fluctuation range displayed on the display screen. If the fluctuation is within the error range allowed by the equipment, it means that the preheating is up to standard; at the same time, conduct a simple no-load test to observe whether the instrument is running stably and whether the parameters are normal. After confirming that it is correct, the formal testing work can be carried out. If the preheating is not up to standard, the preheating time needs to be extended until the instrument reaches a stable operating state.
V. Core precautions for warm-up operation
1. Strictly follow the instructions: Different brands and models of calorimeters have different preheating requirements, so they must be operated in strict accordance with the equipment instructions, and parameters cannot be adjusted at will based on experience to avoid damage to the instrument.
2. Maintain a stable environment: When preheating, ensure that the temperature and humidity of the laboratory environment are stable to avoid environmental factors interfering with the preheating effect of the instrument and affecting the subsequent detection accuracy.
3. Do a good job in daily maintenance: Regularly clean the heat dissipation port and internal dust of the instrument, check the aging of the heating components, and ensure a smooth preheating process and prolong the service life of the instrument.
Mastering the correct preheating method of the calorimeter can not only ensure the accuracy of the detection data, but also prolong the service life of the instrument. Strictly following the above process and controlling every step of detail can efficiently complete the preheating work of the calorimeter and lay the foundation for accurate detection.
 How to read calorimeter data
 What is the design principle of a calorimeter?
 What is the harm of lack of water in the calorimeter?
 What is the input interface of the calorimeter?