How to ignite a calorimeter
calorimeter ignition is a key prerequisite for heat measurement. Precise and standardized ignition operations are directly related to the accuracy of measurement data. The following is a detailed disassembly of the ignition process for you.
Step 1: Prepare thoroughly before ignition
Be sure to do an all-round inspection before ignition. Confirm that the appearance of the calorimeter is in good condition, without loose parts or damage; carefully check the pressure of the oxygen cylinder to ensure that the pressure is in the normal range, the connecting pipeline has no leakage, and the oxygen purity is up to standard. At the same time, after accurately weighing the sample to be tested, it is put into the burning dish and placed in the designated position of the instrument to build a solid foundation for ignition.
The second step: accurately control the ignition parameters
Turn on the power supply of the calorimeter. After the instrument runs stably, enter the ignition parameter setting interface. According to the characteristics of the sample, accurately set the ignition voltage, current and other key parameters. Different samples require different ignition energy, and improper parameter setting can easily lead to ignition failure. It is necessary to strictly refer to the instrument manual.
Step 3: Standardize the ignition operation
Find the ignition button on the instrument operation panel and confirm again that the parameters are correct before pressing it. After pressing the ignition button, pay close attention to the reaction of the instrument and observe the status of the ignition indicator light. If the ignition is successful, the sample in the burning dish will burn rapidly, accompanied by obvious flames; if the ignition fails, turn off the ignition switch immediately, check the oxygen supply, parameter settings and other problems, and try again after troubleshooting.
Step 4: Real-time monitoring after ignition
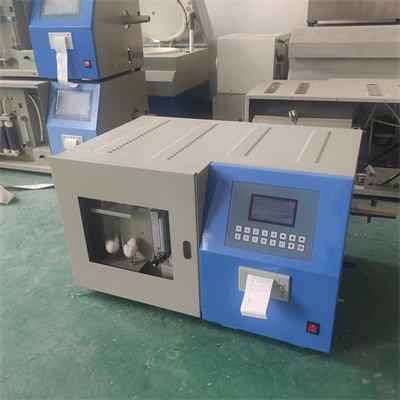
After the ignition is successful, do not relax your vigilance, and continuously monitor the operating status of the instrument. Pay attention to the temperature change curve to ensure that the combustion process is stable and there are no abnormal fluctuations. If there are abnormalities such as sudden temperature changes or combustion interruptions, interrupt the experiment in time, identify the cause and deal with it properly to ensure the safety of the experiment and the reliability of the data.
Step 5: Finish the job safely
After the experiment, close the oxygen supply valve, wait for the instrument to cool to room temperature, clean up the combustion residue, and keep the instrument clean. Finally, turn off the power of the instrument and organize the operation table to create a good environment for the next use.
By mastering the above calorimeter ignition steps and strictly following the operating specifications, you can complete the ignition operation efficiently and safely, laying a solid foundation for accurate measurement.
 How to read calorimeter data
 What is the design principle of a calorimeter?
 What is the harm of lack of water in the calorimeter?
 What is the input interface of the calorimeter?