How to clean the calorimeter
As a key instrument for accurately measuring heat, calorimeters play an important role in experiments and inspections. To ensure its measurement accuracy, regular cleaning is essential. The following is a detailed introduction to the cleaning method of calorimeters.
Preparation before cleaning
Before cleaning, always turn off the power of the calorimeter to avoid the risk of electric shock. Prepare a clean soft cloth, a special cleaning brush, a mild neutral detergent, and distilled water. Also, prepare a clean container for small parts removed during cleaning.
External cleaning
Gently wipe the case of the calorimeter with a clean soft cloth to remove dust and stains from the surface. For stubborn stains, dip the soft cloth in a small amount of neutral detergent dilution, wipe it gently, then wipe off the detergent residue with a clean damp cloth, and finally dry it with a dry cloth to prevent moisture residue from corroding the instrument.
Cleaning of internal key components
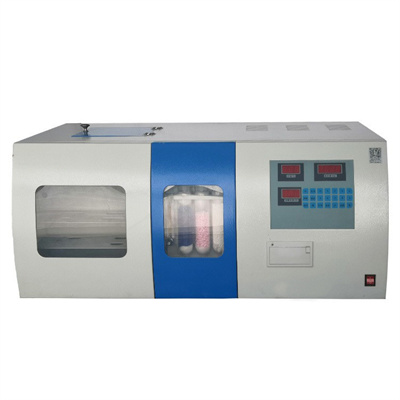
Sample pool cleaning: Carefully remove the sample pool and gently brush away the attached residual substances with a cleaning brush first. If there is a lot of residue, soak the sample pool in a mild neutral detergent solution, soak for a while, brush carefully with a soft brush, then rinse repeatedly with distilled water to ensure that there is no detergent residue, and finally dry it naturally or with a clean soft cloth.
Oxygen bomb cleaning: The oxygen bomb is one of the core components of the calorimeter. Disassemble the oxygen bomb first and check whether the components are damaged. Use a cleaning brush to carefully clean the inner wall, electrodes and other parts of the oxygen bomb to remove combustion residues. For stains that are difficult to clean, use a special oxygen bomb cleaner, clean according to the instructions, and rinse with distilled water after cleaning to ensure that the inside of the oxygen bomb is clean and dry.
Inspection and installation after cleaning
After the cleaning is completed, carefully check whether the components are cleaned and damaged or deformed. After confirming that it is correct, reinstall the components in the correct installation sequence to ensure that the installation is firm. After the installation is completed, turn on the power supply and calibrate the calorimeter to ensure that its measurement accuracy returns to normal.
Cleaning precautions
During the cleaning process, avoid using sharp or hard tools to avoid scratching the surface of the instrument or damaging internal parts. It is strictly forbidden to use strong corrosive cleaners to prevent corrosion to the instrument. After cleaning, make sure that the parts are completely dry before installation to prevent moisture from entering the inside of the instrument and affecting the performance of the instrument.
Mastering the correct cleaning method of the calorimeter can not only prolong the service life of the instrument, but also ensure the accuracy of the measurement results. Follow the above steps to regularly clean and maintain the calorimeter to keep the instrument in the best working condition.
 How to read calorimeter data
 What is the design principle of a calorimeter?
 What is the harm of lack of water in the calorimeter?
 What is the input interface of the calorimeter?