How to use a cone calorimeter
Preparation before operation: build a solid foundation
Before using the cone calorimeter, it is necessary to be fully prepared. First check whether the power supply and line connection of the equipment are normal to ensure that there is no loosening or damage; then calibrate the core parameters of the instrument, such as the accuracy of the heat flow sensor and the oxygen concentration detection module, to ensure the accuracy of the data measurement. At the same time, prepare the sample according to the test standard, cut the sample to the specified size, the surface is flat and flawless, and fix it on the sample rack as required to avoid displacement during testing.
Second, the core operation steps: advance in sequence
1. Boot and parameter setting: Connect the power supply of the equipment, turn on the instrument control software, and enter the operation interface. According to the test requirements, accurately set the key parameters such as heat radiation intensity, test time, data collection frequency, etc. The corresponding parameters of different materials are different, and the corresponding standard settings need to be strictly referred to.
2. Sample installation and sealing: Push the fixed sample into the test chamber of the cone calorimeter with precision, close the cabin door and ensure a tight seal to prevent heat and gas leakage during the test process, which will affect the accuracy of the test results.
3. Start the test process: After confirming that the parameters are correct and the sample is installed in place, click the "Start Test" button, the instrument automatically starts the heating system, heats the sample according to the set heat radiation intensity, and collects data such as quality change, heat release, and flue gas generation in real time.
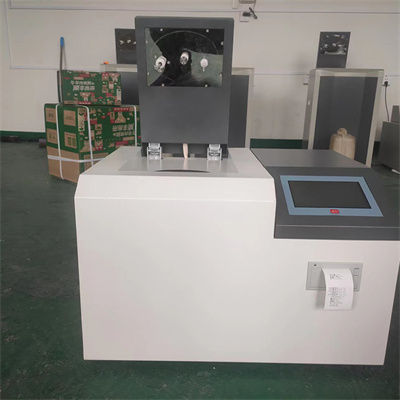
4. Data monitoring and recording: During the testing process, real-time monitoring of various data curves through the software interface, observation of sample combustion status, and timely recording of abnormal conditions ensure that the entire test process is controllable.
III. Finish up after testing: Standardized treatment
After the test, when the instrument automatically stops running and the temperature in the cabin drops to a safe range, open the cabin door to remove the sample residue. Then export the test data, organize and save it in a standard format for subsequent analysis. Finally, turn off the power of the instrument, clean the test cabin and surrounding areas, and keep the equipment tidy and ready for the next use.
IV. Key Considerations: Avoiding Risk
1. Safety protection priority: The test process involves high temperature and combustion, and the operator needs to wear protective gloves and goggles away from the front of the test cabin to prevent burns and burns.
2. Rigorous parameter calibration: Before each test, key parameters must be calibrated to avoid data distortion due to parameter deviations, which could affect the evaluation of material combustion performance.
3. Specimen preparation specifications: Specimen size, flatness, and fixing methods must comply with standards, otherwise large errors will occur in the test results and the true properties of the material cannot be accurately reflected.
4. Timely equipment maintenance: Regularly clean equipment, check the status of core components, and replace aging components in a timely manner to ensure long-term stable operation of the instrument and ensure test accuracy.
 How to read calorimeter data
 What is the design principle of a calorimeter?
 What is the harm of lack of water in the calorimeter?
 What is the input interface of the calorimeter?