How to operate a calorimeter
Preparation before operation
Before operating the calorimeter, make sure that the instrument is in good operating condition. First check whether the power connection of the calorimeter is normal, whether the components are loose or damaged, especially the oxygen bomb components, and carefully check whether the sealing ring is in good condition to avoid air leakage. At the same time, prepare the sample to be tested. The sample needs to be dry and uniform, and the quality meets the requirements of the instrument. Generally, it is controlled between 0.9g and 1.1g. Use a balance to accurately weigh and record the quality of the sample.
Sample loading and oxygen bomb assembly
Put the weighed sample carefully into the combustion dish. If the sample is a splashy substance, it can be wrapped with a known quality mirror cleaning paper before putting it in. Next, place the combustion dish smoothly on the crucible rack of the oxygen bomb, paying attention to maintaining balance. Then assemble the oxygen bomb, align the oxygen bomb head with the main body of the oxygen bomb, and slowly tighten it to ensure a tight connection. Fill the oxygen bomb with an appropriate amount of oxygen, the pressure is controlled at 2.8MPa-3.0MPa. The oxygenation time is maintained for about 30 seconds. After the oxygenation is completed, check whether the oxygen bomb is leaking. It can be judged by observing whether the pressure gauge value is stable.
III. Instrument parameter setting and calibration
Turn on the power of the calorimeter, enter the operation interface, and set the relevant parameters according to the experimental requirements, such as ignition temperature, cooling correction method, etc. To ensure the accuracy of the measurement data, the calorimeter needs to be calibrated. Standard benzoic acid is usually used for calibration, and the standard benzoic acid with known calorific value is put into the oxygen bomb according to the above loading steps, and the combustion experiment is carried out. Adjust the instrument parameters according to the experimental results until the measured value of the instrument matches the standard value.
IV. Sample testing operation
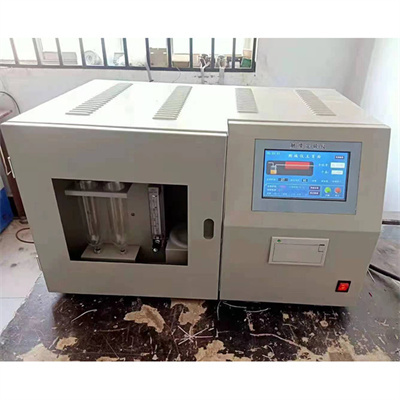
Put the assembled oxygen bomb carefully into the inner cylinder of the calorimeter, and connect the ignition electrode and temperature sensor. Close the outer cover of the instrument and start the test program. The instrument will automatically perform ignition, temperature measurement, calculation and other operations. During the test, pay close attention to the running status of the instrument. If there is any abnormality, such as ignition failure, abnormal temperature fluctuation, etc., the test should be stopped immediately to check the fault. After the test is completed, record the temperature change, time and other relevant data before and after combustion, and calculate the calorific value of the sample according to the built-in formula of the instrument.
The conclusion of the experiment and the maintenance of the instrument
After the test, when the temperature of the instrument drops to room temperature, the outer cover can be opened and the oxygen bomb can be removed. Slowly release the remaining oxygen in the oxygen bomb, then disassemble the oxygen bomb, take out the burning dish, and clean up the residual combustion residue. Finally, clean and maintain the calorimeter, wipe the surface of the instrument, check the various components, and ensure that the instrument is clean and intact, ready for the next use.
By mastering the above standard operation steps, you can accurately and efficiently use the calorimeter to conduct experiments, providing reliable support for various types of calorific value detection work.
 How to read calorimeter data
 What is the design principle of a calorimeter?
 What is the harm of lack of water in the calorimeter?
 What is the input interface of the calorimeter?