How to set the time for a calorimeter
The importance of calorimeter time setting
In all kinds of thermal experiments, calorimeters play a key role, and accurate time setting is the core element to ensure the accuracy of experimental data. A reasonable time setting can allow the experimental reaction to be fully carried out, accurately capture heat changes, and provide a reliable basis for scientific research and testing. Improper time setting may lead to incomplete reactions or deviations in data recording, which may affect the scientificity of the experimental results.
Preparation before calorimeter time setting
1. Familiar with the instrument interface: Different models of calorimeters have differences in the layout of the operation panel and function keys. Before setting the time, be sure to read the instrument manual carefully, be familiar with the functions of each button and display screen, and clarify the operation area corresponding to the time setting.
2. Check the status of the instrument: ensure that the calorimeter is in normal working condition, the power connection is stable, and the parameters of the instrument are initialized normally. At the same time, confirm that the samples and reagents required for the experiment are ready to avoid interrupting the time setting process due to insufficient preparation.
The specific steps of calorimeter time setting
1. Enter the time setting mode: turn on the power supply of the calorimeter. After the instrument completes the self-test and enters the main interface, enter the parameter setting menu through the specific function keys on the operation panel, such as "Menu" and "Settings". In the menu options, find the "Time Settings" or similar function module, and click to enter the time setting mode.
2. Adjust time parameters: After entering the time setting mode, the display screen will display the current time parameters, usually including hours, minutes, seconds, etc. Adjust the time according to the experimental needs through the number keys and up and down adjustment keys on the operation panel. For example, if the experiment requires a reaction time of 30 minutes, adjust the hours and minutes parameters to the corresponding values in turn. During the adjustment process, pay attention to the changes in the value of the display screen to ensure accurate adjustment.
3. Confirm and save the settings: After completing the adjustment of the time parameters, press the buttons such as "Confirm" and "Save" to save the set time parameters to the instrument system. Some calorimeters will prompt "Setup Successful" after saving, indicating that the time setting has been completed. If there is an error during the setting process, you can press the "Cancel" button to readjust.
Check and verify after time setting
After the setting is completed, it is recommended to check again whether the time parameters are consistent with the experimental requirements. You can enter the time setting interface again to view, or start the simulation operation program of the calorimeter to observe whether the time count is normal. If the time setting is found to be wrong, readjust it in time. In addition, before the formal experiment, conduct a small-scale pre-experiment to verify the rationality of the time setting and ensure the smooth progress of the experiment.
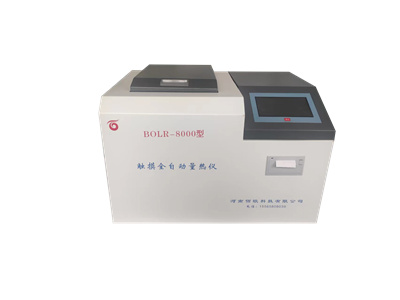
Mastering the time setting method of the calorimeter is the basis for ensuring the accurate development of the experiment. Through the above steps, the time setting of the calorimeter can be completed quickly and accurately, and a solid foundation for subsequent experiments can be established.
 How to read calorimeter data
 What is the design principle of a calorimeter?
 What is the harm of lack of water in the calorimeter?
 What is the input interface of the calorimeter?