How to Drain a Calorimeter Video
In the laboratory, the calorimeter is the core equipment for accurately measuring the heat of a substance, and the drainage operation is a key step to ensure its stable operation. If the drainage is improper, it will not only affect the measurement accuracy, but also damage the instrument. The following video tutorial will help you disassemble the drainage method of the calorimeter in detail.
First, the preparation work before drainage
Before draining, be sure to turn off the power of the calorimeter to avoid the risk of electric shock. At the same time, prepare a clean water receiving container, absorbent cotton cloth and protective gloves to ensure a dry and ventilated operating environment. In addition, it is necessary to carefully check the location of the drain port of the calorimeter. The design of the drain port of different models of calorimeters is slightly different, which can be accurately positioned through the product manual to lay a good foundation for subsequent operations.
Second, the core drainage operation steps
1. Open the drain valve: Find the drain valve of the calorimeter, usually knob type or press type, rotate or press slowly according to the direction of the equipment identification, and the force should be uniform to avoid damage to the valve parts due to excessive force.
2. Discharge residual liquid: Align the water receiving container with the drain port and slowly discharge the residual liquid inside the instrument. During the drainage process, pay attention to observe the liquid discharge status. If there is a blockage, do not force the operation. You need to check the cause before continuing.
3. Clean the drain: After the liquid is drained, wipe the drain and surrounding areas with an absorbent cotton cloth to remove residual water stains and impurities to prevent dirt accumulation from causing poor drainage.
4. Close the drain valve: After confirming that the liquid is completely drained and the drain is clean, reverse the operation to open the valve, close the valve and ensure that it is tightened to prevent water leakage during subsequent use.
III. Inspection and maintenance after drainage
After the drainage is completed, it is necessary to connect the power supply, start the calorimeter for no-load test, and observe whether the instrument is running normally, whether there is any leakage, abnormal sound and other problems. If any abnormality is found, the power supply should be turned off immediately and the drainage operation should be re-checked. In addition, it is recommended to regularly perform drainage maintenance on the calorimeter, and formulate a maintenance plan according to the frequency of use to ensure that the instrument is always in the best working condition.
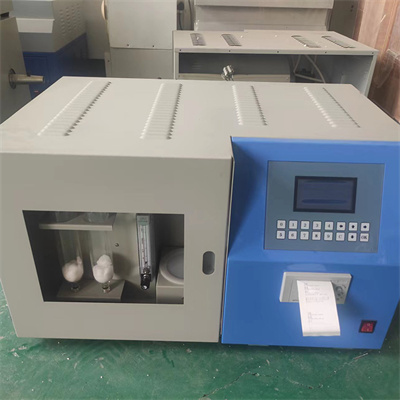
Through the above steps, combined with the supporting calorimeter drainage video tutorial, you can more intuitively grasp the operation details. Strictly following the standard process can not only ensure the measurement accuracy of the calorimeter, but also prolong the service life of the equipment, and lay a solid foundation for the experimental work.
 How to read calorimeter data
 What is the design principle of a calorimeter?
 What is the harm of lack of water in the calorimeter?
 What is the input interface of the calorimeter?