How to replace the calorimeter water?
As a key device for accurately measuring heat, the internal water state of the calorimeter directly affects the measurement accuracy. Regular replacement of the calorimeter water is an important part of ensuring the stable operation of the equipment. The following is a detailed introduction to the replacement method of the calorimeter water, which is simple and easy to learn.
The first step is to make preparations before changing the water
Before replacing the calorimeter water, be sure to turn off the power supply of the equipment to avoid the risk of electric shock, and cut off the water source connection to prevent water leakage during the water change process. Prepare clean distilled water or deionized water, which is pure in water quality and can avoid impurities affecting the performance of the calorimeter. Also prepare clean wipes and special containers for receiving old water and cleaning the periphery.
Step 2: Regulate the discharge of old water
Locate the drain port of the calorimeter, usually located at the bottom or side of the device, place the special container directly below the drain port, slowly open the drain valve, and let the old water flow out smoothly. Pay attention to the observation during the discharge process. After the old water is completely emptied, close the drain valve to avoid residual moisture affecting the subsequent operation.
Step 3: Clean the interior carefully
After the old water is emptied, gently wipe the inside of the calorimeter with a clean wipe cloth, focusing on cleaning the residual scale, sediment and other impurities to ensure that the inside is clean and free of residue. When cleaning, be gentle to avoid scratching the inner wall of the equipment and affecting the service life and measurement accuracy of the equipment.
Step 4: Precise injection of new water
The prepared distilled water or deionized water is slowly injected into the calorimeter. During the water injection process, the flow rate should be controlled to avoid the generation of bubbles. At the same time, the water level should be observed and the water level should be injected in strict accordance with the water level line required by the equipment manual. It should neither cause too much overflow nor affect the normal operation of the equipment too little.
Step 5: Check after completing the water change
After the water injection is completed, carefully check whether the drain is closed tightly and whether there is any water leakage around the equipment. Then turn on the power supply, start the calorimeter, observe the running status of the equipment, and confirm that the parameters are normal. After the water change work is successfully completed.
Precautions for changing water
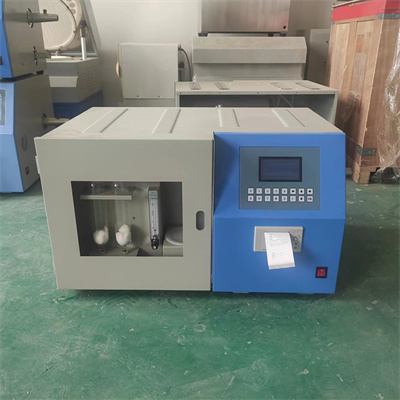
1. During the water change process, live operation is strictly prohibited, and it is necessary to ensure that the equipment is powered off to ensure safe operation.
2. It is strictly forbidden to use water sources containing impurities such as tap water and mineral water, so as not to clog the equipment pipeline and affect the measurement accuracy.
3. The frequency of water change should be determined according to the frequency of use of the equipment and the water quality. It is recommended to replace it regularly according to the requirements of the equipment manual to ensure that the equipment is always in the best working condition.
 How to read calorimeter data
 What is the design principle of a calorimeter?
 What is the harm of lack of water in the calorimeter?
 What is the input interface of the calorimeter?