How to wire the calorimeter oxygenator tube?
When using a calorimeter for related experiments, the correct wiring of the oxygenation tube is crucial, which is directly related to the accuracy of the experiment and the normal operation of the instrument. The following is a detailed introduction to the wiring method of the oxygenation tube of the calorimeter.
Preparation
Before starting wiring, make sure that the calorimeter and oxygenator are in a power-off state to avoid the risk of electric shock. At the same time, prepare suitable tools, such as screwdrivers, insulating tape, etc., and carefully check whether the wiring of the oxygenator tube is intact, whether it is damaged or broken.
Identify the wiring port
Open the cases of the calorimeter and the oxygenator, and find the wiring ports corresponding to the oxygenator tubes. Usually, these ports will be clearly marked, such as "power supply", "signal", "control" and other words. Different models of instruments may have different port layouts and logos, but the basic principle is the same.
Connect the power cord
Connect the power cord of the oxygenator tube to the power interface of the calorimeter. Generally speaking, the power cord is divided into positive and negative electrodes, and it should be connected in strict accordance with the requirements of the instrument manual to ensure that the positive and negative electrodes correspond correctly. When connecting, use a screwdriver to tighten the terminals to prevent loose contact.
Connect signal cable
The signal cable is responsible for transmitting the working signal of the oxygenator, and it needs to be accurately connected to the signal receiving port of the calorimeter. During the connection process, pay attention to the plug direction of the signal cable to avoid plugging it in upside down. After plugging it in, gently pull the signal cable to check whether it is firmly connected.
Connect the control cable
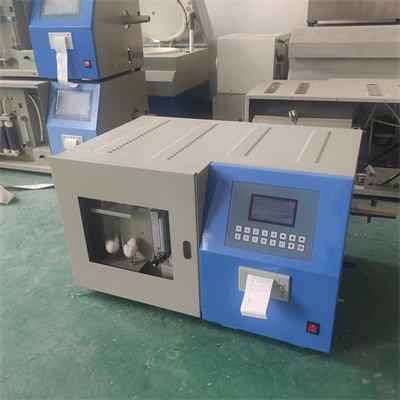
The control cable is used to control the start-stop and working state of the oxygenator, and connect it to the control port of the calorimeter. Similarly, according to the instructions in the manual, connect the control cable to the corresponding port and fix the wiring terminals.
Inspection and fixation
After all wiring is completed, carefully check the connection of each line to ensure that the connection is firm and not loose. Wrap the exposed wiring parts with insulating tape to prevent short circuits. Finally, install the instrument case and restore it to its original state.
After completing the above steps, you can power on to test the working status of the oxygenator tube. If the instrument is running normally, the wiring is successful; if there is an abnormality, the power should be cut off immediately, and the wiring steps should be re-checked to troubleshoot. Mastering the correct wiring method of the calorimeter oxygenator tube can make you more handy during the experiment.
 How to read calorimeter data
 What is the design principle of a calorimeter?
 What is the harm of lack of water in the calorimeter?
 What is the input interface of the calorimeter?