How to install a calorimeter video
As the core equipment for accurately measuring the heat of matter, the installation process is directly related to the follow-up detection accuracy and operation stability. Master the scientific installation method, so that the equipment can be put into use quickly. The following is combined with the installation video to disassemble the installation process for everyone.
Step 1: Precision preparation before installation
Be sure to make full preparations before installation, which is the basis for ensuring a smooth installation. First check the core components of the calorimeter, such as the host, oxygen bomb, ignition device, temperature probe, etc., to confirm that there is no transportation collision damage, and the accessories are complete and not missing. Then prepare suitable installation tools, such as screwdrivers, wrenches, and levels. At the same time, choose a smooth, dry installation site away from strong electromagnetic interference to reserve sufficient operating space for the equipment.
Step 2: The host is accurately positioned and fixed
Place the calorimeter host in the predetermined installation position smoothly, and adjust the fuselage with the help of the level to ensure that the host is in an absolutely horizontal state. The tilt of the fuselage will cause uneven force on the internal parts and affect the operation accuracy of the equipment. Find the fixing hole at the bottom of the host and firmly fix the host on the ground or countertop with expansion screws or anchor bolts to avoid shaking and displacement during the operation of the equipment and ensure the stability of the detection data.
Step 3: Orderly assembly of core components
Follow the installation video guidelines to complete the assembly of the core components in sequence. First, precisely connect the oxygen bomb with the connection interface of the host to ensure that the interface is tightly sealed to prevent oxygen leakage. After the installation is completed, air tightness testing is carried out. Then install the ignition device, adjust the position and tightness of the ignition wire, and ensure the ignition success rate. Finally, correctly connect the temperature measurement probe to the corresponding interface of the host to ensure that the line connection is firm and there is no loosening or virtual connection.
Step 4: Line connection and debugging
Connect power cords, signal lines and other types of lines according to the equipment manual and the logo of the installation video. Pay attention to distinguish the type of interface when connecting to avoid damage to the equipment caused by wrong lines. After the line connection is completed, check before power on to confirm that the line connection is correct and then turn on the power supply. After booting, follow the debugging steps of the installation video to preheat the equipment, calibrate the parameters, check the tightness of the oxygen bomb, the ignition function, and the temperature measurement accuracy to ensure that all functions can operate normally.
Step 5: Final acceptance after installation
After the installation and debugging are completed, clean the equipment comprehensively, wipe the dust of the fuselage, and organize the scattered installation tools. Check the functions of the equipment one by one according to the acceptance standards in the installation video, and organize the installation records after confirming that it is correct. Mark the installation time and debugging parameters of the equipment to facilitate subsequent maintenance and management.
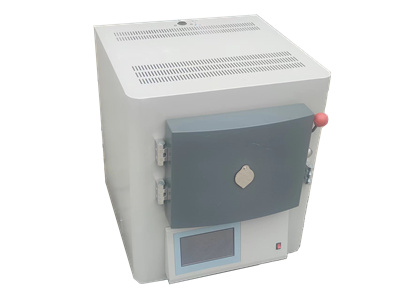
The entire installation process is followed by the installation video, which can greatly reduce the difficulty of installation. As long as the steps are strictly followed and every detail is controlled, the installation of the calorimeter can be completed efficiently, laying a solid foundation for subsequent accurate detection.
 How to read calorimeter data
 What is the design principle of a calorimeter?
 What is the harm of lack of water in the calorimeter?
 What is the input interface of the calorimeter?