How to fill the calorimeter with water video
When conducting a calorimeter experiment, the water injection operation of the calorimeter is a key prerequisite for ensuring the accuracy of the experiment. Many customers are not familiar with the water injection process, resulting in deviations in the experimental data. The following is combined with professional operation specifications and practical operation points to explain the water injection method of the calorimeter in detail for you, and help you quickly master the core skills.
First, preparations before water injection
Before water injection, it is necessary to confirm the model of the calorimeter and the corresponding water injection port specifications. There are differences in the water injection capacity and interface design of different models of calorimeters. Prepare distilled water or deionized water in advance to avoid impurities in the water affecting the experimental results, and prepare clean measuring cups, funnels and other auxiliary tools to ensure that the water injection process is clean and orderly.
Second, the core steps of accurate water injection
1. Find the water injection port: carefully check the logo of the calorimeter body to clarify the location of the water injection port. Some of the water injection ports of the calorimeter are equipped with a dust cover. You need to open the dust cover first to clean up the dust and debris around the water injection port.
2. Control the water injection amount: strictly follow the capacity marked in the calorimeter manual for water injection. During the water injection process, it can be accurately measured with the help of a measuring cup to avoid overflow due to excessive water injection, or insufficient water injection affecting the normal development of the experiment.
3. Standardize the water injection operation: Slowly inject the water into the water injection port with the help of a funnel. Keep the water flow smooth and avoid bubbles during water injection. If bubbles are accidentally generated, you can gently shake the calorimeter. After the bubbles are discharged, they can be replenished to the specified water level.
III. Inspection and confirmation after water injection
After the water injection is completed, it is necessary to check whether the water injection port is tightly sealed to prevent water leakage during the experiment. At the same time, observe the water level mark to ensure that the water level is in the standard range. If the water level is insufficient, it needs to be replenished in time. After confirming that it is correct, the follow-up experimental process can be started.
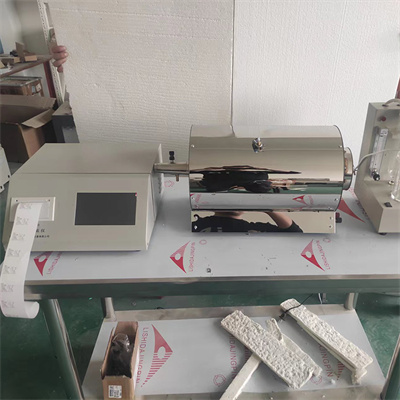
In order to make it easier for everyone to learn intuitively, we have simultaneously produced a practical video of the calorimeter water injection operation. The video shows the details of each step in detail, with key steps marked, so that you can understand it at a glance and learn it as soon as possible. It is easy to solve the problem of water injection of the calorimeter and ensure the smooth progress of the experiment.
 How to read calorimeter data
 What is the design principle of a calorimeter?
 What is the harm of lack of water in the calorimeter?
 What is the input interface of the calorimeter?