How to change paper with a calorimeter video
In the process of using a calorimeter in the laboratory, paper changing is a common and critical operation link. Mastering the correct paper changing method can ensure the accurate operation of the calorimeter. The following are the steps to disassemble the calorimeter and change the paper in detail, and you can easily get started by following the operation.
Step 1: Prepare before changing the paper
Turn off the power of the calorimeter first to avoid electric shock or equipment failure during operation. Prepare a suitable special recording paper to ensure that the paper specification matches the calorimeter. At the same time, prepare a clean soft cloth and tweezers for cleaning and assisting in picking and placing the paper, creating a safe and tidy environment for paper changing operations.
Step 2: Precise opening of the paper bin device
The position of the paper compartment of different types of calorimeters varies slightly, and the common ones are side-open and top-open. Find the opening buckle or button of the paper compartment, press and toggle gently, and open the paper compartment cover smoothly. The operation force should be moderate to prevent damage to the buckle or compartment cover. At the same time, pay attention to whether there is any residual paper scraps in the warehouse and clean it up in advance.
Step 3: Standardize the removal of old paper and dispose of it
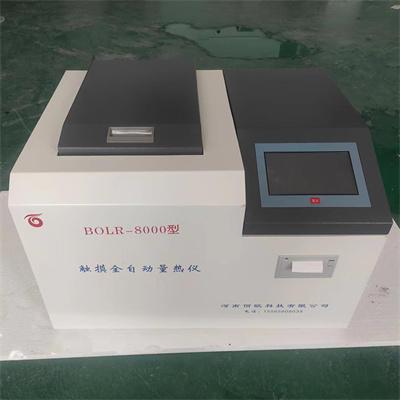
Use tweezers to clamp the edge of the old recording paper and slowly pull it out of the paper compartment to avoid paper tears remaining inside the instrument. After removing the old paper, wipe the inner wall of the paper compartment with a soft cloth to remove dust, paper scraps and other impurities to ensure that the compartment is clean and free of foreign objects, and prepare for loading new paper.
Step 4: Load the new paper correctly
Take out the new recording paper, put the paper in flat according to the guide mark of the paper compartment, pay attention to the front and back sides and placement direction of the paper, ensure that the edges of the paper are aligned, and avoid skewed and wrinkled. Gently push the paper to fit the transmission parts of the paper compartment to ensure that the paper can move smoothly. After installing, gently close the paper compartment cover to confirm that the buckle is fastened.
Step 5: Test and verify after paper change
Re-connect the power supply of the calorimeter, start the equipment, select the test mode for idling test, and observe whether the recording paper can run normally and whether the printing is clear. If there are problems such as paper jam or blurred printing, immediately turn off the power supply, re-check the installation of the paper, and test again after adjustment until it runs normally to ensure that the paper change operation is correct.
By following the above steps, the paper change of the calorimeter can be completed efficiently, ensuring the stable operation of the instrument and laying a solid foundation for the experimental work.
 How to read calorimeter data
 What is the design principle of a calorimeter?
 What is the harm of lack of water in the calorimeter?
 What is the input interface of the calorimeter?