How to repair the motor with a calorimeter
In laboratory work, the stable operation of the calorimeter is crucial, and the motor, as the core power component of the calorimeter, will directly affect the normal use of the equipment once it fails. Mastering the maintenance method of the calorimeter motor can help us solve the problem quickly and ensure the progress of the experiment. Below, I will introduce the maintenance steps of the calorimeter motor in detail.
Troubleshooting: Identify the root cause of the problem
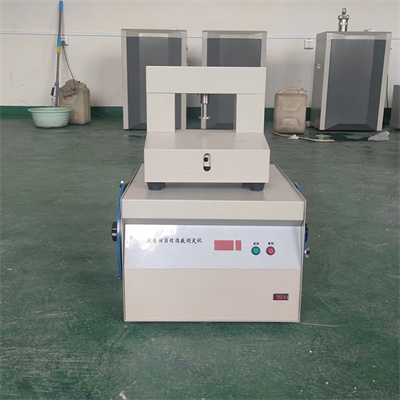
When the motor of the calorimeter fails, the first thing to do is to troubleshoot. Common faults are that the motor does not rotate, the speed is abnormal, there is abnormal noise, etc. We can first check whether the power connection is normal, check whether the power cord is loose or damaged, and whether the socket has electricity. If the power supply is normal, then check the transmission parts of the motor to see if there is any foreign object stuck, or whether the belt is loose or broken. In addition, it is also necessary to check the control circuit of the motor to see if the components on the circuit board are burned out, soldered, etc. Through gradual investigation, the fault point can be accurately located and prepared for subsequent maintenance.
Tool preparation: complete guarantee maintenance
Before repairing the calorimeter motor, prepare the necessary tools. Commonly used tools include screwdrivers, wrenches, multimeters, electric soldering irons, etc. Screwdrivers and wrenches are used to remove the motor housing and fixed parts; multimeters can detect the resistance, voltage and other parameters of the motor to determine whether the motor is damaged; electric soldering irons are used to solder components on the circuit board. Ensure that the tools are complete and in good condition, which can improve the maintenance efficiency and avoid delaying the maintenance progress due to missing tools.
Motor dismantling: standardized operation to ensure safety
When disassembling the calorimeter motor, be sure to follow the standardized operation process. First, disconnect the power supply of the calorimeter to ensure safe operation. Then, use a screwdriver and wrench to gradually remove the shell, end cover and other components according to the structure of the motor. During the disassembly process, pay attention to recording the installation position and order of each component to avoid errors during installation. At the same time, handle it with care to prevent damage to the components. For some complex motors, it may also be necessary to mark the line connection to facilitate subsequent installation.
Component overhaul: precise repair of faults
After the dismantling is completed, the various components of the motor are overhauled. Focus on checking the windings of the motor to see if there is a short circuit, open circuit, insulation aging, etc. You can use a multimeter to measure the resistance of the windings. If the resistance value is abnormal, it indicates that there is a problem with the windings. For a short circuit or open circuit of the windings, it is generally necessary to re-wind the windings; if the insulation is aging, the insulating material needs to be replaced. In addition, check the bearings of the motor to see if there is wear, lack of oil, etc. If the bearings are damaged, the bearings of the same type need to be replaced in time. At the same time, check the brushes and commutators to see if there is any wear, poor contact and other problems, and polish or replace
Assembly and commissioning: ensure the normal operation of the equipment
After the parts are overhauled, they are assembled in the reverse order when they are disassembled. During the assembly process, make sure that each part is installed in place and the screws are tightened. After the assembly is completed, connect the power supply and debug. Run the motor without load first, and observe the operation of the motor to see if there is any abnormal noise, vibration, etc. If the no-load operation is normal, then perform a load test to check whether the speed, torque and other parameters of the motor under load meet the requirements. If problems are found during the debugging process, it is necessary to stop the machine in time for inspection and troubleshoot until the motor runs normally.
Through the above steps, we can complete the maintenance of the calorimeter motor. During the maintenance process, we must strictly abide by the operating specifications to ensure safety and maintenance quality. Mastering these maintenance skills can not only solve the common faults of the calorimeter motor, but also prolong the service life of the equipment and provide a strong guarantee for laboratory work.
 How to read calorimeter data
 What is the design principle of a calorimeter?
 What is the harm of lack of water in the calorimeter?
 What is the input interface of the calorimeter?