How to change the water in the calorimeter
During the experiment of the calorimeter, the quality of the water has a significant impact on the measurement results. Regular water change is the key to ensure its accurate operation. The following is a detailed introduction to the water change method of the calorimeter.
Preparation before changing the water
Before changing the water in the calorimeter, be sure to turn off the power of the instrument to avoid the risk of electric shock. At the same time, prepare clean distilled or deionized water to ensure that the water quality is pure and prevent impurities from affecting the performance of the instrument. In addition, prepare a clean rag and a suitable container for cleaning and holding old water.
Discharge steps for old water
Locate the drain port of the calorimeter, usually located at the bottom or side of the instrument. Connect the drain pipe to the drain port and put the other end into the prepared container. Open the drain valve and let the old water drain slowly. During the discharge process, pay attention to observe the water flow. If the drain is not smooth, it may be that the drain port is blocked. You can gently unclog it with a clean tool. After the water is completely drained, close the drain valve.
Internal cleaning of the instrument
After the old water is drained, the inside of the instrument needs to be simply cleaned. Wipe the inner wall of the instrument with a clean rag to remove residual water stains and dirt. For difficult-to-clean areas, use a soft brush to gently brush, but be careful to avoid scratching the inner wall of the instrument. After cleaning, open the drain valve again to discharge the sewage generated by cleaning.
Injection of new water
Slowly pour the prepared distilled or deionized water into the water filling port of the calorimeter. During the water addition process, pay close attention to the water level scale to avoid adding too much or too little water. Generally speaking, the water level should reach the scale line specified by the instrument. After the water addition is completed, close the water filling port cover to ensure a good seal.
Inspection and debugging after water change
After the water change is completed, reconnect the power supply of the instrument and turn on the calorimeter for self-test. Check whether the various parameters of the instrument are normal, such as temperature, pressure, etc. If any abnormality is found, the cause should be checked in time, and the water change operation should be re-carried out if necessary. At the same time, observe whether there is water leakage during the operation of the instrument. If there is any water leakage, check the sealing parts and deal with it in time.
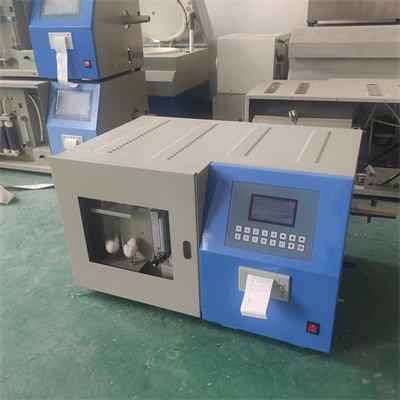
Mastering the correct method of changing the water of the calorimeter can not only ensure the measurement accuracy of the instrument, but also prolong the service life of the instrument. By following the above steps, you can easily complete the water change of the calorimeter and provide a strong guarantee for the smooth progress of the experiment.
 How to read calorimeter data
 What is the design principle of a calorimeter?
 What is the harm of lack of water in the calorimeter?
 What is the input interface of the calorimeter?